LiteLLM + Authentik SSO: Full Admin Access with Automatic Role Mapping
LiteLLM is an OpenAI-compatible proxy that lets you route requests to multiple LLM providers through a single API. It has a built-in admin UI with SSO support. Authentik is an open-source identity provider that supports OAuth2/OIDC out of the box.
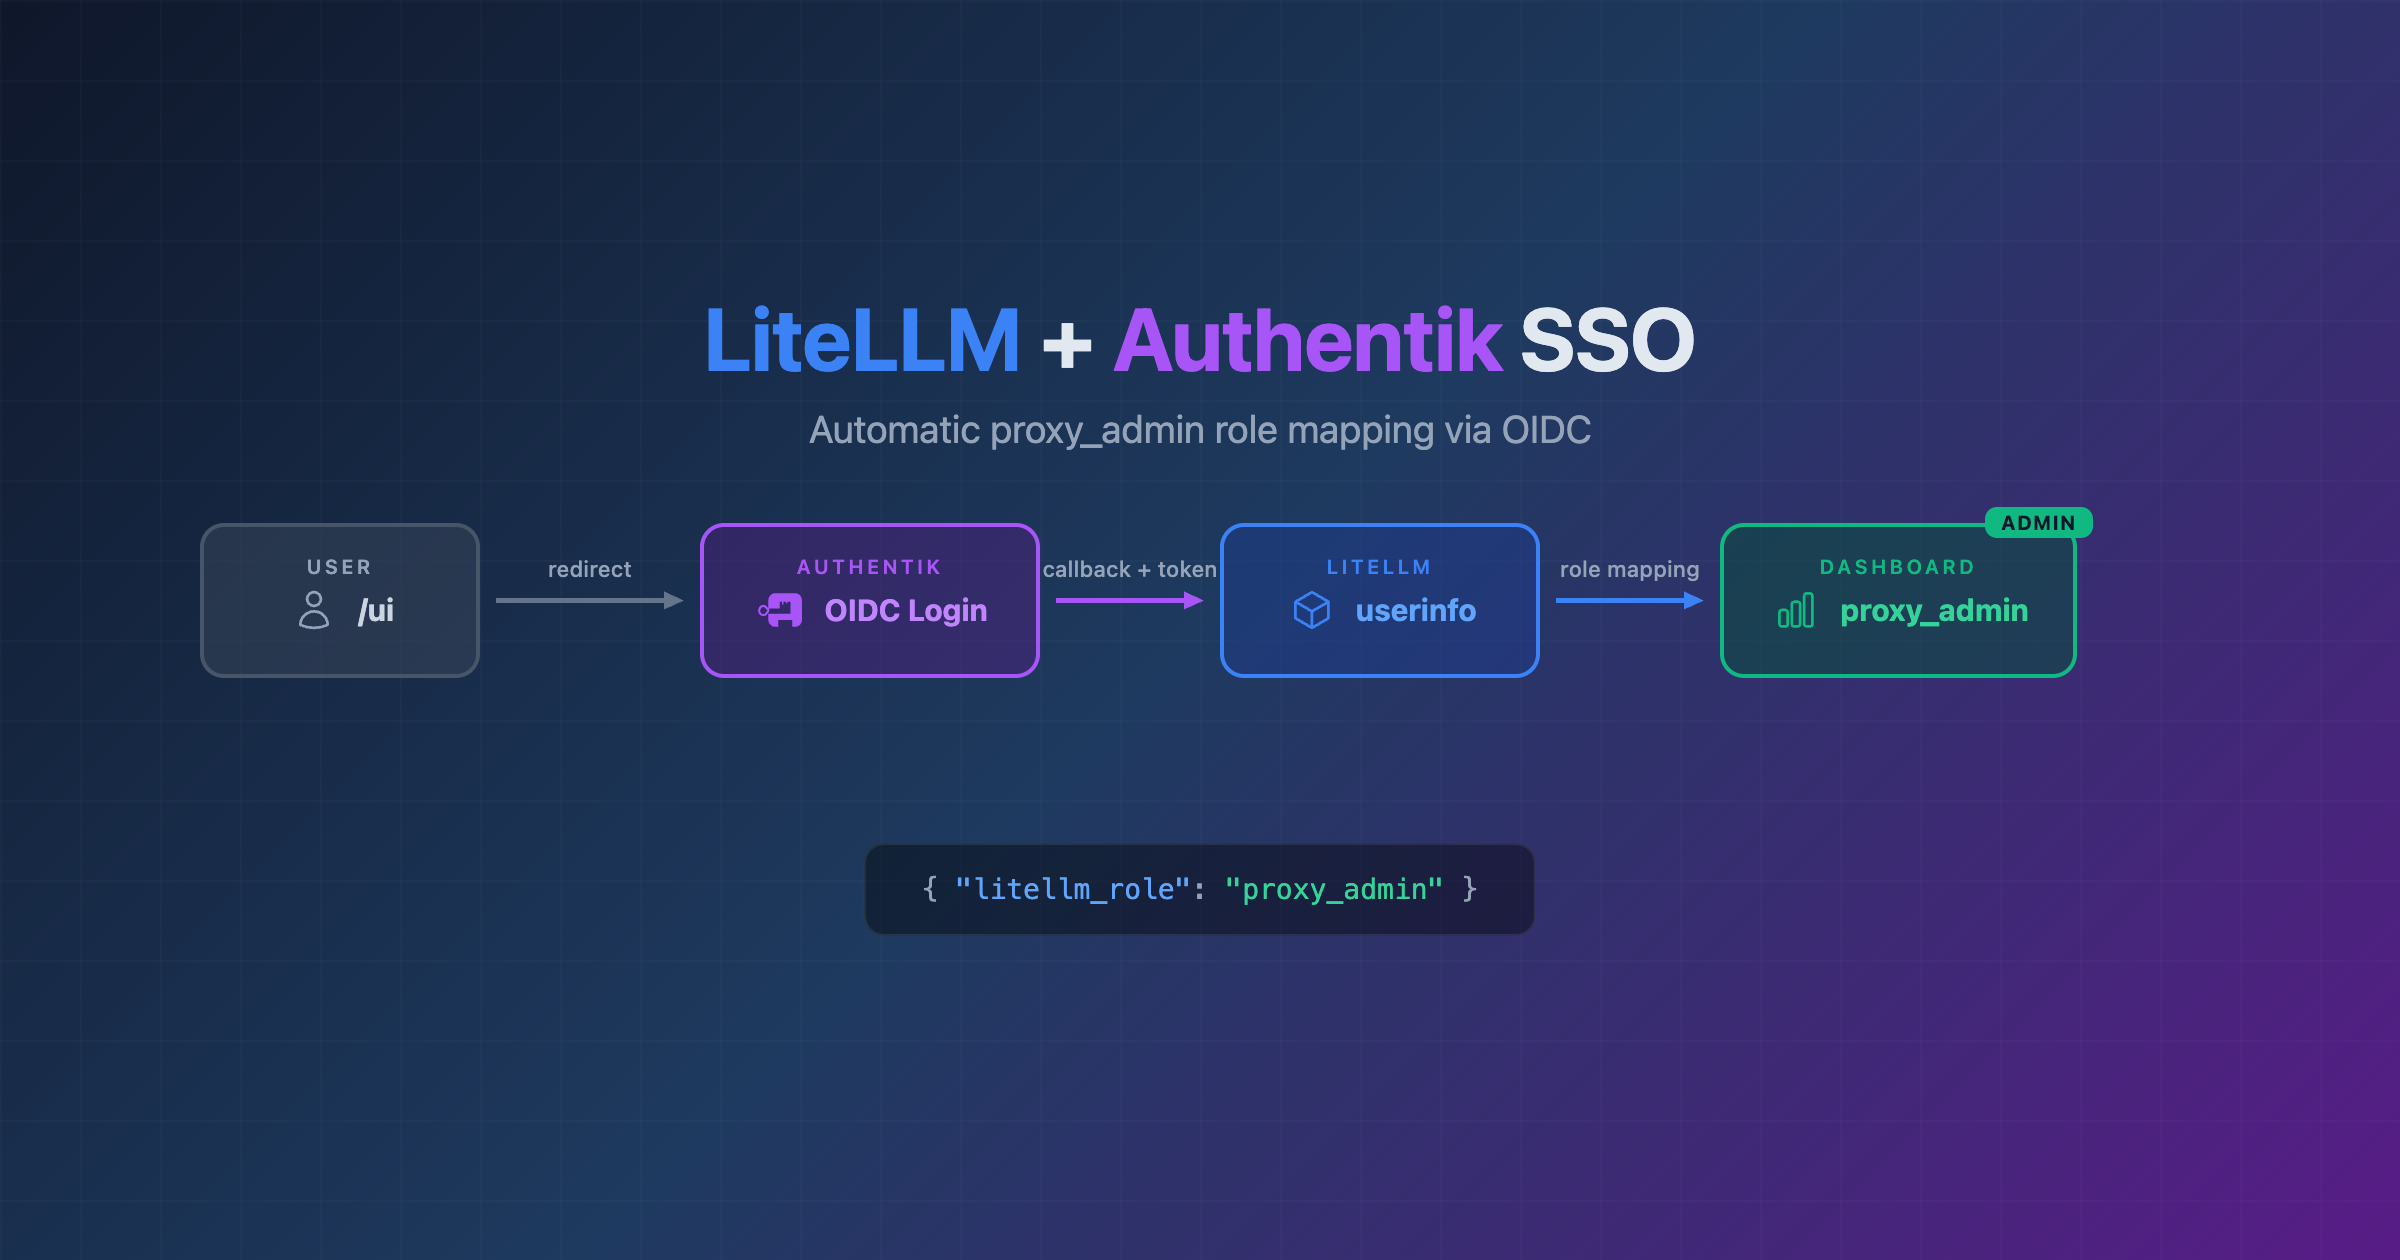
This guide shows you how to wire them together so users can log into LiteLLM via Authentik and automatically get the proxy_admin role – no manual role assignment needed.
The End Result
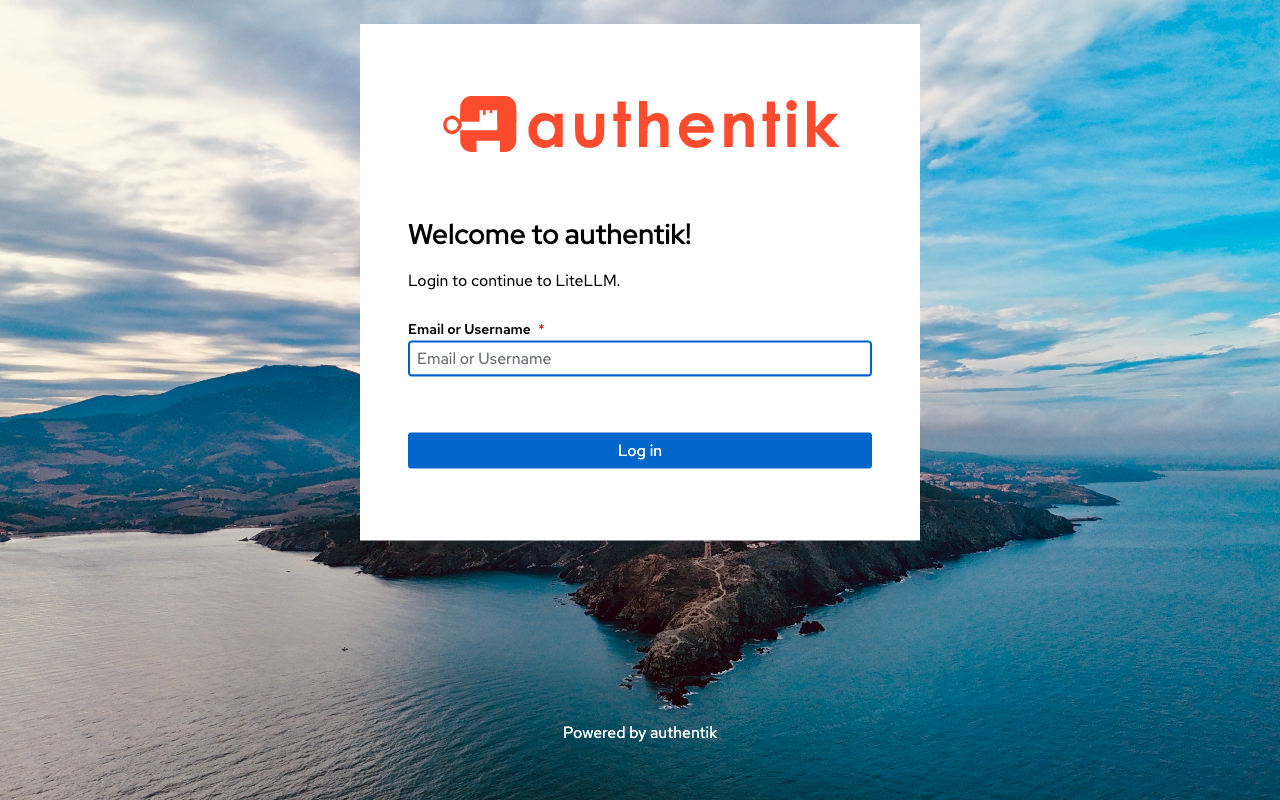
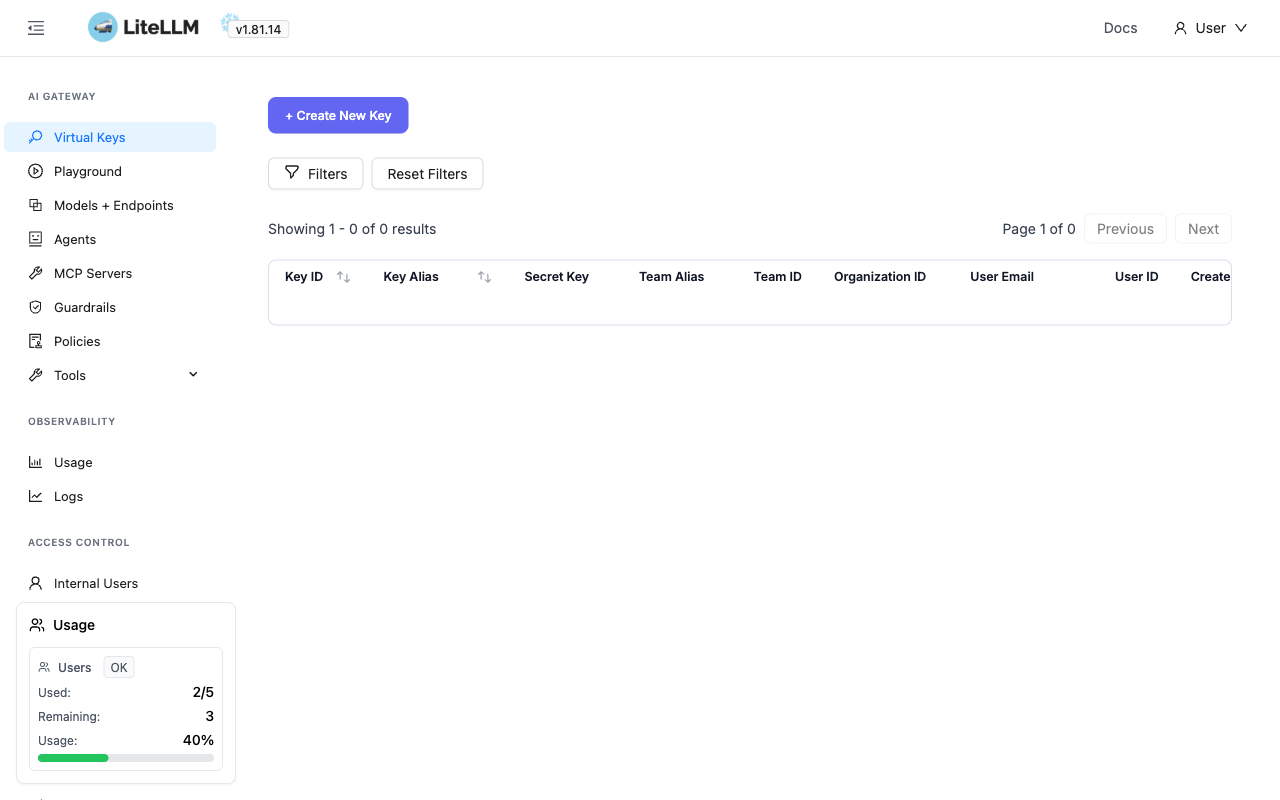
After setup, visiting the LiteLLM UI automatically redirects to Authentik. After authenticating, the user lands on the full admin dashboard.

What You Need
- A running Authentik instance
- A running LiteLLM Proxy instance (with Postgres)
- Both accessible over HTTPS
Part 1: Authentik Configuration
Three things to set up in the Authentik admin UI:
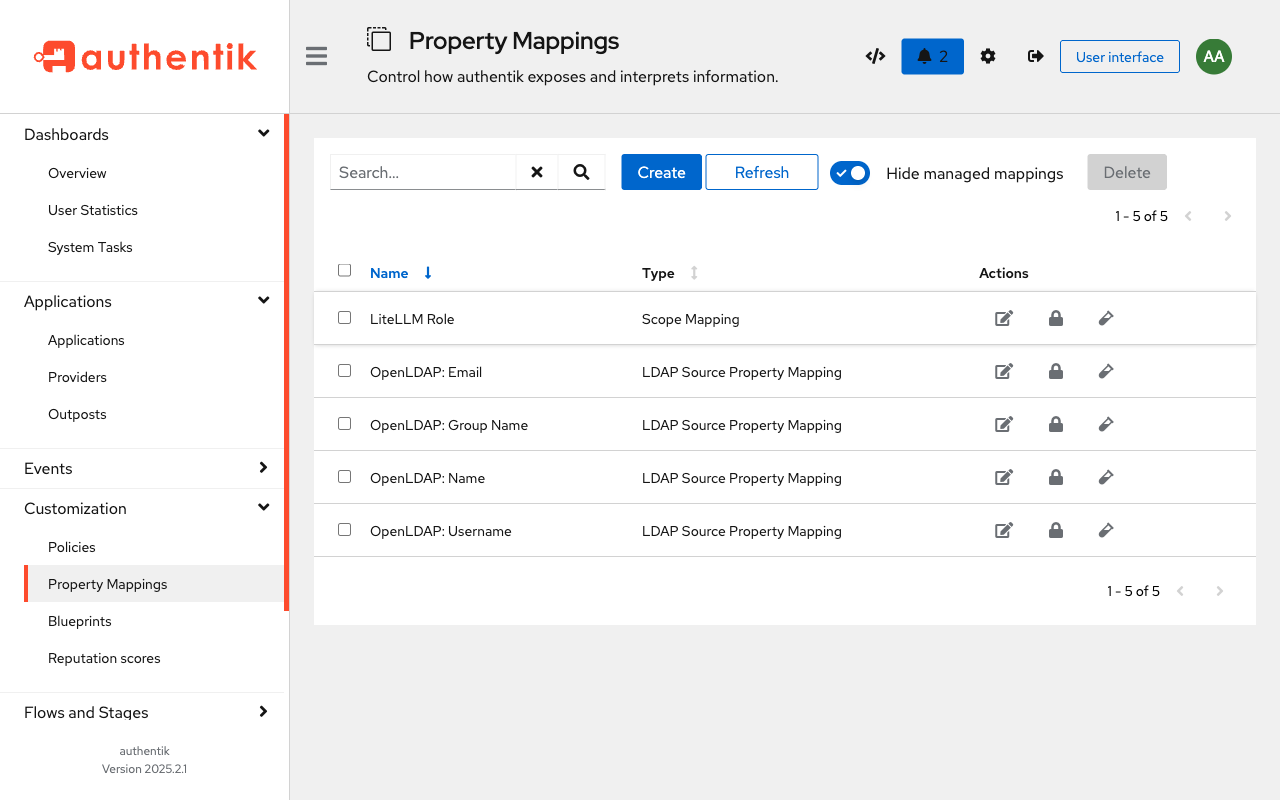
1. Create a Scope Mapping for the LiteLLM Role
This is the key piece. LiteLLM reads a litellm_role claim from the OIDC userinfo response to determine the user’s role. We need Authentik to include this claim.
Go to Customization → Property Mappings → Create → Scope Mapping and set:
| Setting | Value |
|---|---|
| Name | LiteLLM Role |
| Scope name | litellm_role |
| Expression | return {"litellm_role": "proxy_admin"} |
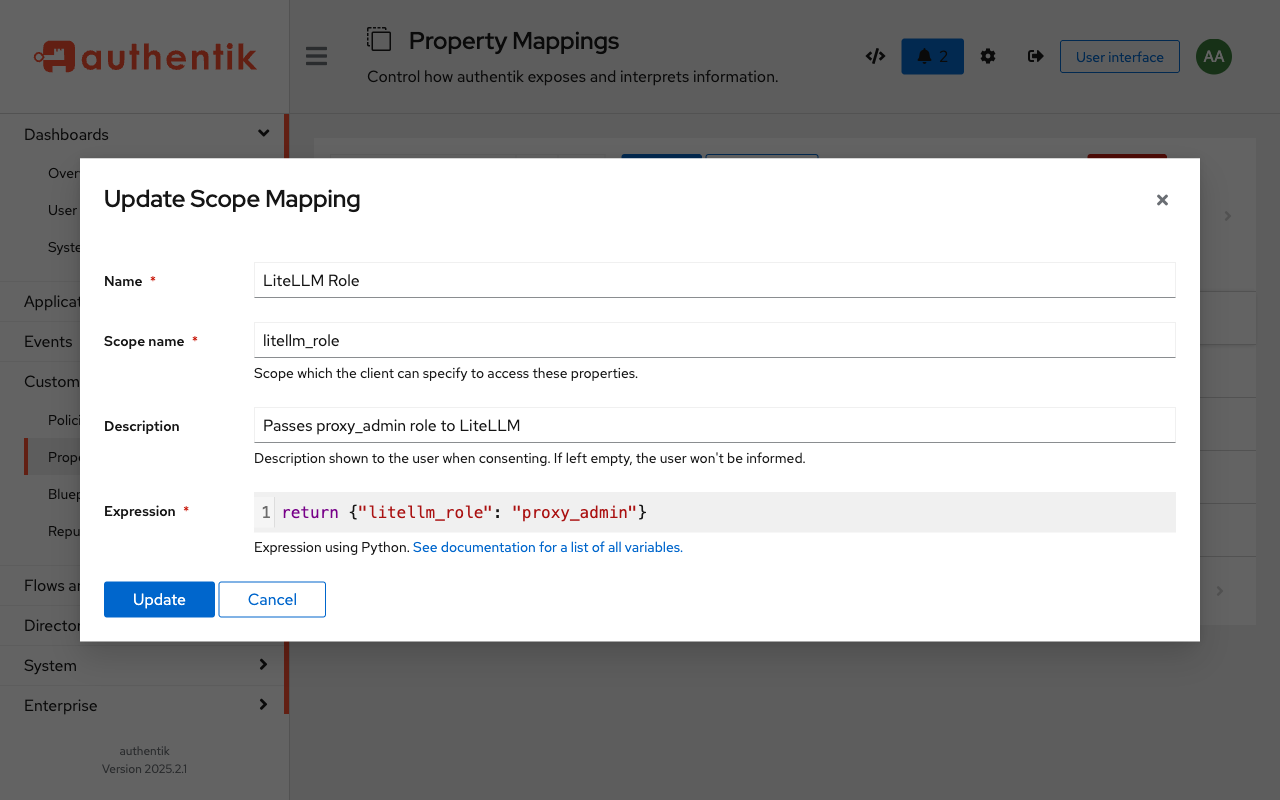
What this does: When LiteLLM requests the litellm_role scope during the OIDC flow, Authentik returns {"litellm_role": "proxy_admin"} in the userinfo response. LiteLLM reads this and assigns the role on first login.
Want different roles per user? You can make the expression conditional based on group membership:
if ak_is_group_member(request.user, name="admins"):
    return {"litellm_role": "proxy_admin"}
return {"litellm_role": "internal_user"}
Valid roles: proxy_admin, proxy_admin_viewer, internal_user, internal_user_view_only
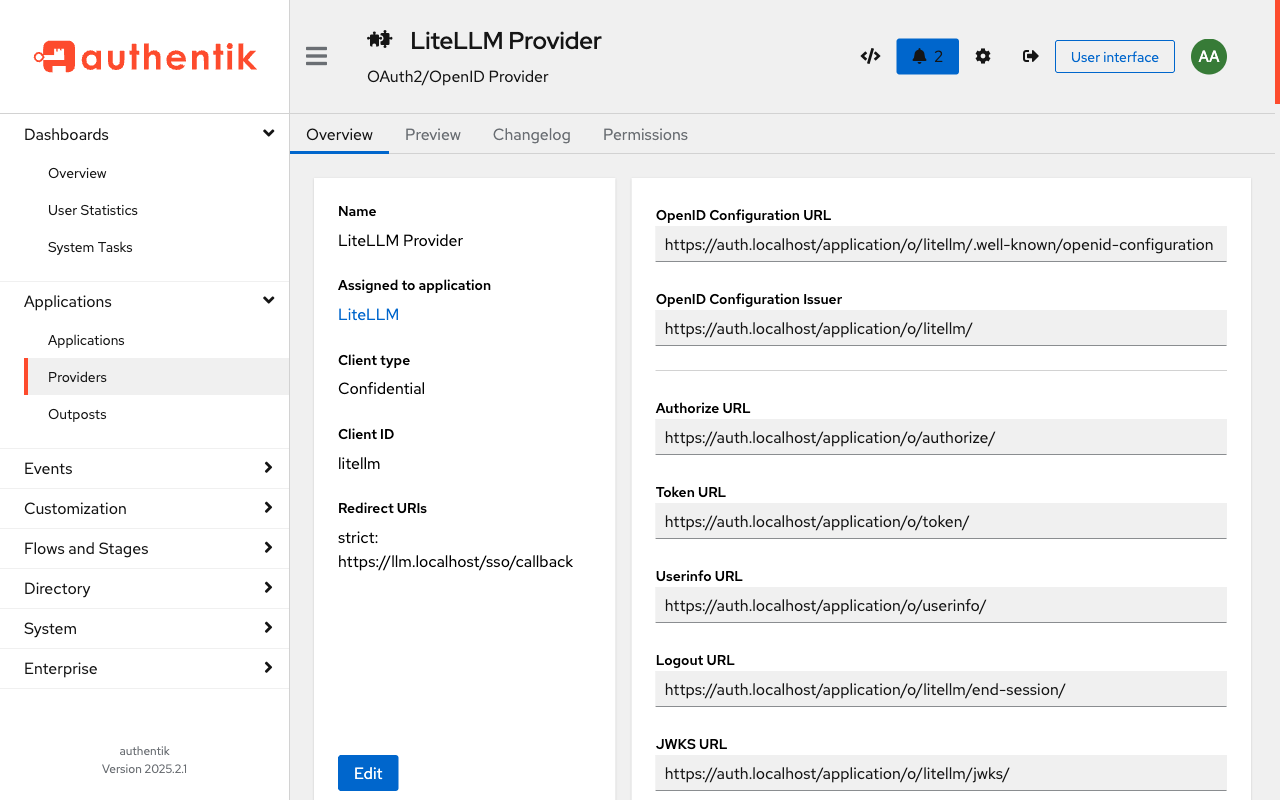
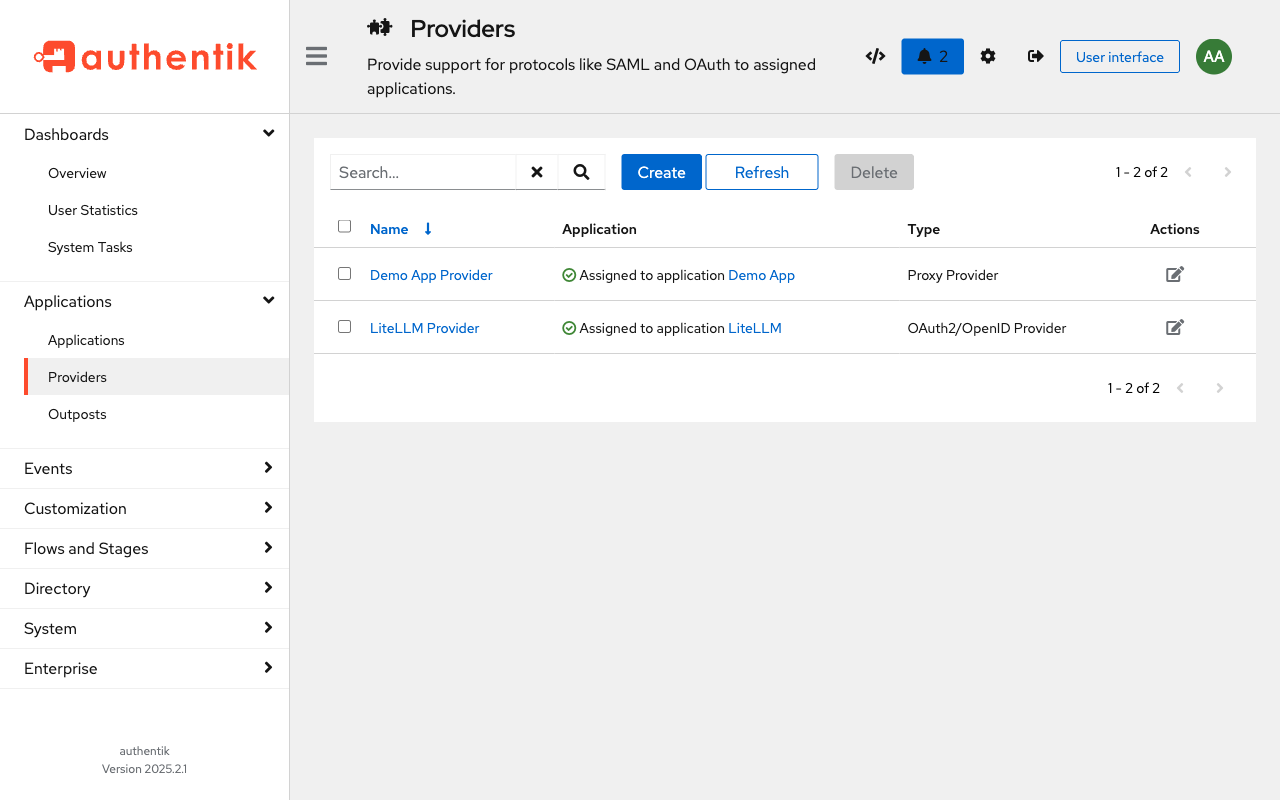
2. Create an OAuth2/OpenID Provider
Go to Applications → Providers → Create → OAuth2/OpenID Provider:
| Setting | Value |
|---|---|
| Name | LiteLLM Provider |
| Authorization flow | default-provider-authorization-implicit-consent |
| Client type | Confidential |
| Client ID | litellm |
| Client Secret | litellm-client-secret (use your own) |
| Redirect URIs | https://llm.yourdomain.com/sso/callback |
| Scopes | Select: openid, profile, email, LiteLLM Role |
| Subject mode | Based on the User’s Username |
Important: Make sure to add the LiteLLM Role scope mapping (from Step 1) to the provider’s scopes. Without it, the role claim won’t be included in the token.
3. Create an Application
Go to Applications → Applications → Create:
| Setting | Value |
|---|---|
| Name | LiteLLM |
| Slug | litellm |
| Provider | LiteLLM Provider |
| Launch URL | https://llm.yourdomain.com/ui |
Part 2: LiteLLM Configuration
Set these environment variables on your LiteLLM Proxy:
# Authentik SSO (Generic OIDC)
GENERIC_CLIENT_ID=litellm
GENERIC_CLIENT_SECRET=litellm-client-secret
GENERIC_AUTHORIZATION_ENDPOINT=https://auth.yourdomain.com/application/o/authorize/
GENERIC_TOKEN_ENDPOINT=https://auth.yourdomain.com/application/o/token/
GENERIC_USERINFO_ENDPOINT=https://auth.yourdomain.com/application/o/userinfo/
GENERIC_SCOPE=openid profile email litellm_role
GENERIC_USER_ROLE_ATTRIBUTE=litellm_role
PROXY_BASE_URL=https://llm.yourdomain.com
PROXY_LOGOUT_URL=https://auth.yourdomain.com/application/o/litellm/end-session/
AUTO_REDIRECT_UI_LOGIN_TO_SSO=true
Here’s what each one does:
| Variable | Purpose |
|---|---|
GENERIC_CLIENT_ID / SECRET | Must match what you set in the Authentik provider |
GENERIC_*_ENDPOINT | Standard OIDC endpoints – Authentik shows these on the provider detail page |
GENERIC_SCOPE | Must include litellm_role to request the custom scope |
GENERIC_USER_ROLE_ATTRIBUTE | The magic. Tells LiteLLM which field in the userinfo response contains the role |
PROXY_BASE_URL | Used to construct the redirect URI (/sso/callback) |
PROXY_LOGOUT_URL | Where to redirect after logout – use Authentik’s OIDC end-session endpoint so the user is logged out of both LiteLLM and Authentik |
AUTO_REDIRECT_UI_LOGIN_TO_SSO | Skip the LiteLLM login page entirely – visiting /ui sends users straight to Authentik |
How the Flow Works
- User visits
/ui– with auto-redirect enabled, they’re sent straight to Authentik (no login page) - LiteLLM redirects to Authentik’s authorization endpoint with
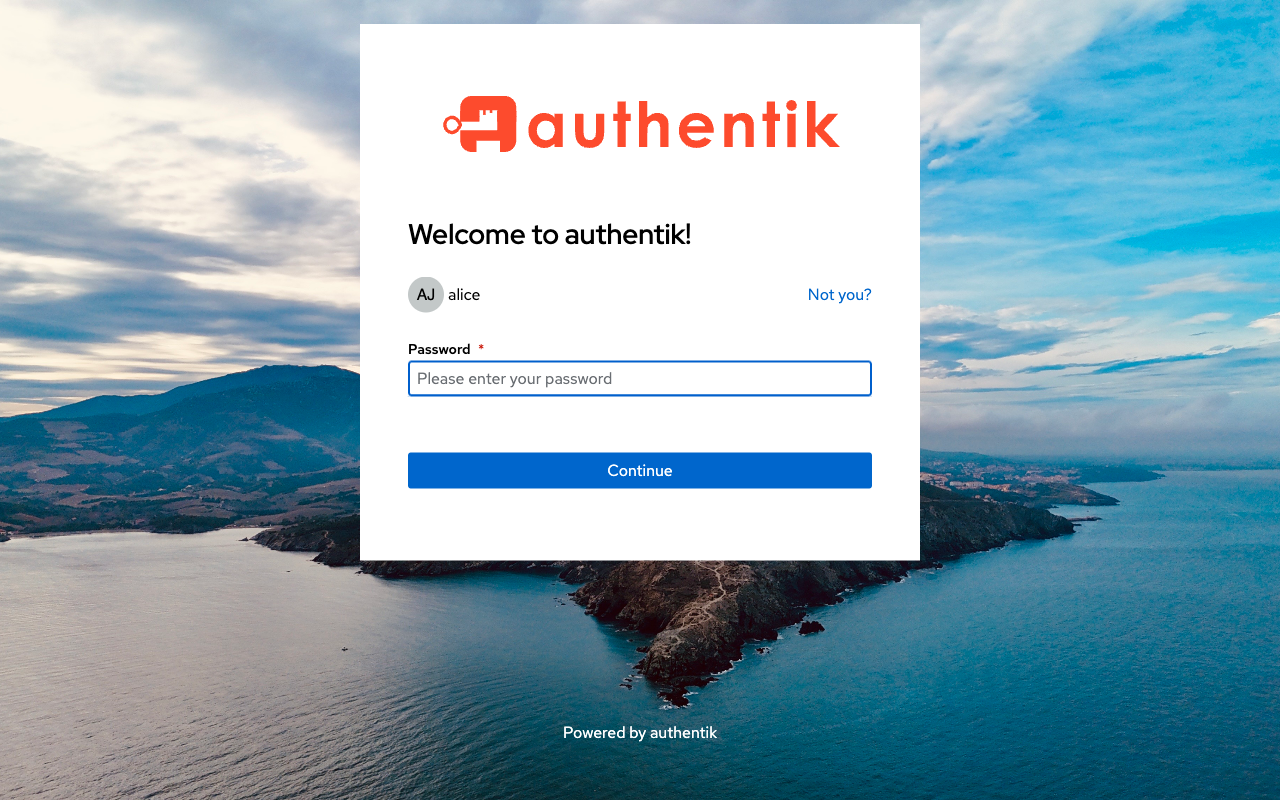
scope=openid profile email litellm_role - User authenticates on Authentik
- Authentik redirects back to
/sso/callbackwith an authorization code - LiteLLM exchanges the code for a token, then calls the userinfo endpoint
- Authentik returns user info including
"litellm_role": "proxy_admin" - LiteLLM creates the user in its DB with
user_role=proxy_admin - User lands on the full admin dashboard
Bonus: Auto-Redirect and Logout
Skip the login page with AUTO_REDIRECT_UI_LOGIN_TO_SSO
By default, visiting /ui shows LiteLLM’s login page with a “Login with SSO” button. If Authentik is your only auth method, you can skip this page entirely:
AUTO_REDIRECT_UI_LOGIN_TO_SSO=true
With this set, navigating to https://llm.yourdomain.com/ui immediately redirects to Authentik. Users never see the LiteLLM login form – they go straight to SSO.
Note: This also hides the username/password login. If you need to log in with the master key for debugging, use the API directly with Authorization: Bearer $LITELLM_MASTER_KEY.
Proper logout with PROXY_LOGOUT_URL
Without this, clicking “Logout” in LiteLLM only clears the local session – the user is still authenticated in Authentik. The next time they visit LiteLLM, they’re silently logged back in (especially annoying with auto-redirect enabled).
Set PROXY_LOGOUT_URL to Authentik’s OIDC end-session endpoint:
PROXY_LOGOUT_URL=https://auth.yourdomain.com/application/o/litellm/end-session/
The URL format is https://<authentik-host>/application/o/<application-slug>/end-session/. This logs the user out of both LiteLLM and Authentik in one click.
Gotchas
Email validation
LiteLLM uses Pydantic to validate the email from the SSO response. Emails with .local TLD (like [email protected]) will be rejected. You have a few options:
- Use real email domains – make sure your Authentik users have valid emails (e.g.
[email protected]) - Map email to a different field – set
GENERIC_USER_EMAIL_ATTRIBUTEto pull from a different claim (e.g.preferred_username) that doesn’t get validated as strictly - Drop email from the scope – remove
emailfromGENERIC_SCOPEso Authentik doesn’t send it at all - Fabricate a valid email in Authentik – create a scope mapping that generates an email from the username:
return {"email": request.user.username + "@yourdomain.com"}
Role is persisted on first login
The role from the SSO claim is written to LiteLLM’s database on the user’s first login. If you add the role mapping after a user has already logged in, their old role sticks. Fix it with a one-time API call:
curl -X POST https://llm.yourdomain.com/user/update \
  -H "Authorization: Bearer $LITELLM_MASTER_KEY" \
  -H "Content-Type: application/json" \
  -d '{"user_id": "the-username", "user_role": "proxy_admin"}'
Self-signed certificates
If you’re running with self-signed certs (dev/lab), LiteLLM’s SSO library (fastapi_sso) uses httpx which will reject them. You’ll need to either:
- Use real certs (recommended for production)
- Monkeypatch
httpx.AsyncClientto default toverify=False - Ensure
auth.yourdomain.comresolves to your reverse proxy from inside the LiteLLM container
Docker Compose Example
services:
  litellm:
    image: ghcr.io/berriai/litellm:main-stable
    environment:
      DATABASE_URL: "postgresql://litellm:secret@litellm-db:5432/litellm"
      STORE_MODEL_IN_DB: "True"
      LITELLM_MASTER_KEY: "sk-your-master-key"
      LITELLM_SALT_KEY: "sk-your-salt-key"
      GENERIC_CLIENT_ID: "litellm"
      GENERIC_CLIENT_SECRET: "your-client-secret"
      GENERIC_AUTHORIZATION_ENDPOINT: "https://auth.yourdomain.com/application/o/authorize/"
      GENERIC_TOKEN_ENDPOINT: "https://auth.yourdomain.com/application/o/token/"
      GENERIC_USERINFO_ENDPOINT: "https://auth.yourdomain.com/application/o/userinfo/"
      GENERIC_SCOPE: "openid profile email litellm_role"
      GENERIC_USER_ROLE_ATTRIBUTE: "litellm_role"
      PROXY_BASE_URL: "https://llm.yourdomain.com"
      PROXY_LOGOUT_URL: "https://auth.yourdomain.com/application/o/litellm/end-session/"
      AUTO_REDIRECT_UI_LOGIN_TO_SSO: "true"
    ports:
      - "4000:4000"

  litellm-db:
    image: postgres:16-alpine
    environment:
      POSTGRES_DB: litellm
      POSTGRES_USER: litellm
      POSTGRES_PASSWORD: secret
    volumes:
      - litellm_data:/var/lib/postgresql/data

volumes:
  litellm_data:
Tested with LiteLLM v1.81.14 and Authentik 2025.2.1. The SSO feature is free for up to 5 users as of LiteLLM v1.76.0+.
This post was written by Claude (claude-opus-4-6), Anthropic’s AI assistant, with human direction and review.